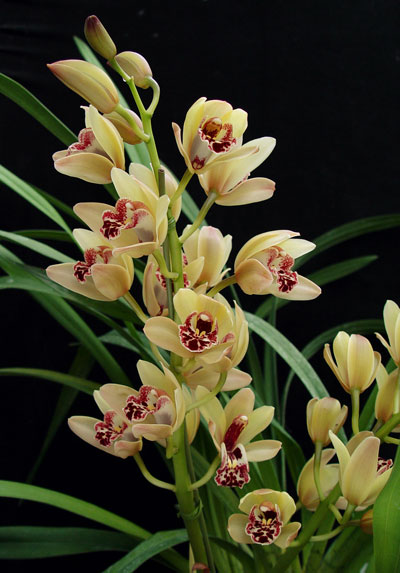
Cymbidium are native to the foothills of the Himalayas and are accustomed to cool conditions. Their tall spikes bloom with 10 to 25 flowers, ranging from 2.5" to 6" wide and can last from one to three months. Many of these flowers have the added appeal of fragrance! Their popular flower types and elegant long leaves make Cymbidium orchids attractive as indoor plants.
Light and Shade
When growing Cymbidium outdoors, place the plant where it receives bright but diffuse light, such as through a pine tree or shrub in early morning or afternoon. Be careful not to exposure these orchids to prolonged direct sunlight, as the leaves will burn and produce black spotting. Indoors, the light will be much more filtered, so give them as much light as you can by growing in south, east or west-facing windows.
Temperature and Humidity
While these orchids can be cultured successfully indoors, Cymbidium benefit tremendously from growing outdoors between May to early October. In late summer and early fall, night temperatures that fall below 58°F (15°F) initiate the development of flower spikes. Keep in mind, these are not frost-tolerant plants, and should not be exposed to temperatures below 35°F (2°C). When bringing Cymbidium indoors in the fall, place them in a bright, cool section of your home, preferably in a south or east-facing window. Like most orchids, Cymbidium benefit from high humidity. This can be achieved at home with the use of a humidifier or a humidity tray. Just make sure that the plant is not standing in water or the roots will rot.
Watering
These orchids enjoy a moist growing medium at all times. The media should never go "bone dry". A fine spray over the foliage, in addition to pot watering, is beneficial during sunny weather. Cymbidium orchids undergo active growth from spring to early fall. During this time, Cymbidium should be watered frequently and heavily. From fall through winter, less sun results in growth pausing. For this period of time, watering can be reduced. The goal during the winter is to water the root system only as necessary, without over-watering and leading to root rot.
When repotting your Cymbidium during the active growing season, do not water the media for at least 3 days. This allows cuts and breaks in the roots to callous and avoid rotting upon being watered.
We always recommend watering in the morning, as this gives the leaves time to dry and avoid bacterial growth overnight. If possible, use water low in alkalinity, such as rainwater, distilled water, or reverse osmosis water. If you have a dehumidifier in your home, the water that collects in the tray is excellent for watering orchids.
Feeding
We highly recommend Green Jungle Orchid Food, specially formulated to provide orchids with the nutrients they would naturally encounter in their wild habitats. This is the fertilizer that we developed to use on our own plants in production, with excellent results for decades! This formula works best with water low in alkalinity (such as rainwater, distilled water, or reverse osmosis water). However, you may use tap water, keeping in mind that mineral buildup will require repotting more frequently, on the order of every 1 to 2 years.
If potting in bark mix, fertilize every time you water during the summer growing season, flushing with non-softened water once a month. This rinses the media of salt and mineral buildup. In winter, fertilize every other watering, as Cymbidium are not in a state of active growth during this season. If potting in sphagnum moss, fertilize every 3rd watering year round.
Potting
Cymbidium thrive in a light, porous medium, capable of holding moisture while draining thoroughly upon watering. At Orchids Limited, we recommend potting these plants in New Zealand Sphagnum Moss or the Medium grade of our Traditional Orchid Bark Mix.
These orchids do best when the root system is left undisturbed, so repot only when the medium has broken down. When plants need to be divided and repotted, do so in the spring after the plants have finished blooming.
Cymbidium produce an extensive root system and may be "over-potted" more readily than other orchids. Select a pot which, once the plant has been placed in the center, allows space for at least two years' growth. Remove all dead or dying roots from the plant, carefully taking off the old compost without causing damage to the live roots. Should you wish to divide your plant at this time, each section should have three or four green bulbs in addition to any new leads. Old leafless pseudobulbs should be removed if the procedure will cause no damage to the rest of the plant. You can watch our video on dividing orchids here.
To avoid the transfer of orchid diseases, it is standard procedure to sterilize all cutting and potting instruments before using them on a plant. This can be done by flaming pruning shears with a butane torch, or by spraying with rubbing alcohol and wiping with a clean paper towel.
Pest Control
These plants have long thin leaves what are prone to tiny, almost invisible spider mites on the undersides. To avoid getting the mites, take the plant into the shower once a month and spray the foliage lightly with room temperature water. If you have spider mites, insecticidal soap sprayed 3 times, one week apart, should control them.
